Home-built Lawn Aerator – Part 2
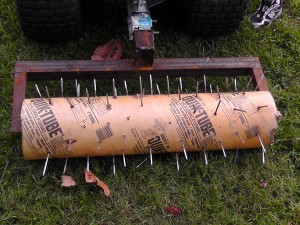
Well, after mowing today I decided to hook up the aerator for a few spins around the yard. It rained yesterday so the ground is nice and soft which probably helps. Here it is hooked up to my tractor. You can see my son’s shoe in the upper right corner of the picture… now how did that get in there?!
Yeah, you’re right. It’s already starting to rust already. I had contemplated painting it, but for some reason I like the idea of old farm implements “weathering and rusting” out in the field and kinda decided to leave it bare and see what will happen to it. It might be a tetanus accident waiting to happen, but I’m thinking the nails will rust too and paint won’t stick to them after a few laps around the yard, so what’s the point anyway.
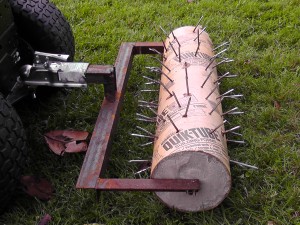
Here’s a view from the side. One thing I’ve found out is that some of the nails don’t take rolling over concrete too well.
I suppose if I ever made a second unit, I would shorten the nails slightly and put more of them in it to help it roll over the concrete better.
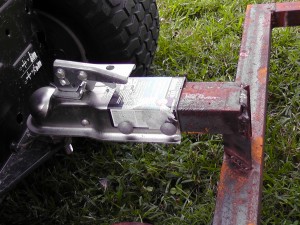
Ok. I did not have the hitch laying around the garage. I actually bought that at Home Depot, and for the last picture, I better show the rest of the parts that I had to specifically buy to put this thing together.
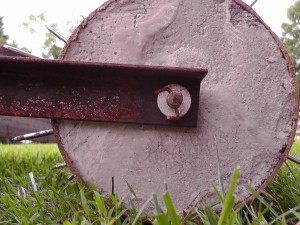
Here’s the side view where you can see the other purchase I had to make (axle rod and washers). I used some axle grease that my brother had on hand and the thing spins quite freely!
Here’s a video clip of it in action that my son recorded!
Home-built Lawn Aerator and Roller Combo – Part 1
*** Warning***
***This post has absolutely nothing to do with wood but hopefully it is interesting enough to read anyway ***
I’ve decided to try something wacky and build my own lawn aerator. In addition to poking some holes in the grass, I am hoping that it can smash down the mole tunnels at the same time due to the weight of it after it is filled with concrete. Best yet, I nearly have all the stuff laying around that I need to build it except a piece or two that I can pick up at the local Home Depot… or salvage from my brother’s scrap steel.
I’m sure the design isn’t the most “safe” configuration, but we’ll let the moles worry about that.
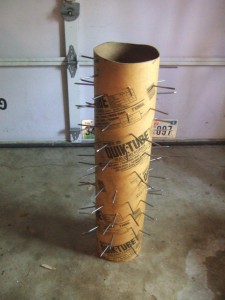
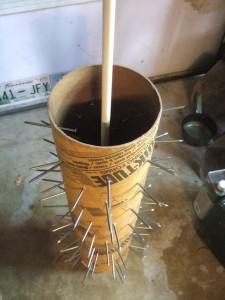
I used a drill equipped with a fairly small bit and randomly drilled holes all around the concrete form. I am not too concerned about the cardboard deteriorating. I figure I have the nails embedded deep enough that they won’t slip out on their own. Here’s a view from the top to give you an idea of what I mean.
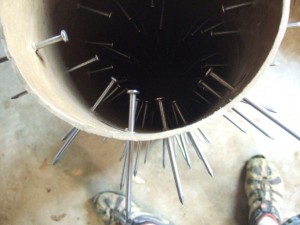
The nails are far enough into the cavity to hopefully stay put. They’re a size larger than a regular 16d framing nail so they are pretty hefty.
In order to prep the cylinder for pouring I cut a piece of rigid foam into a circle and marked the center. I stuck a piece of 1/2″ CPVC in the center of it, pulled it out and then stuck it into the concrete form.
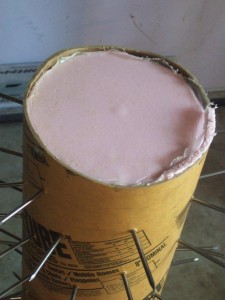
Here’s what will be the bottom side when pouring in the concrete. It serves a few purposes. To hold the CPVC tube in the center when pouring all the concrete in as well as keep all the concrete from running out the bottom.
Here it is flipped over and ready for the concrete to be added. I also made another circular foam cutout to hold the top side of the CPVC in the center.
I moved it outside and grabbed the concrete bags out of the garage. All the stuff I’ve used so far has been leftovers from other projects. I prefer to ignore the fact that I may have “over-purchased” on previous jobs and choose to believe all the stuff is “free” at this point. 😉
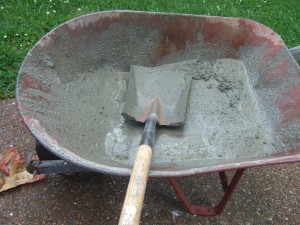
Ok ok.. I was sweating too much and my hands were a little too dirty to pick up the camera while mixing up the concrete and filling the form. I do think a flat bottom shovel really helps get it mixed thoroughly and a lot easier.
Here it is with it chalk full of concrete and the top foam piece in place.
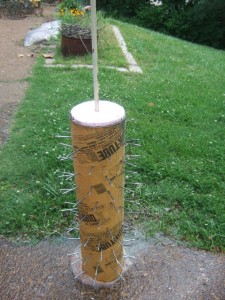
A wee bit of the concrete bled out of the bottom. I stuck a plastic bag under it just in case, but that really didn’t help at all.
I ended up buying a small ball hitch and a piece of round rod for the axle and welded it all together in my brother’s garage. Unfortunately I didn’t take any pictures over there during the assembly, but next post I make, I’ll try to take some of the finished product and have it hooked up to my riding lawnmower.
Deck Stain
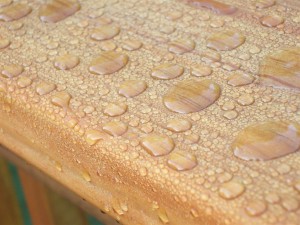
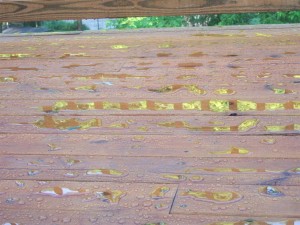
I finally have 3 coats of stain on the deck. I ended up waiting a while – like half a year, as this seemed to be the stronger argument out there on the Internet for when or how soon to stain a deck. It seemed to really suck the stain up and so I’ve decided to try to quench it’s thirst and have gone over most of the horizontal surfaces 3 times using the Olympic brand of stain. I really like how the water beads up now after a rain…
Another shot-
Ohh.. and by the way, you may have noticed that the site is a different URL/domain name now instead of “junkwood.info”… I’m just being thrify as the renewal price isn’t as attractive the 2nd year, so I opted to get a different one. Hopefully this doesn’t mess you up too bad if you’re following along.. I tried to force the old site to automatically forward to the new “junkwood.info” name.
And to further prove how cheap I’ve become, I’m planning on posting next on the home-built lawn aerator that I “built” from junk I had mostly laying around in my garage and my brother’s. 😉
Ohhh.. one more thing.. here’s an update RSS Feed link as well..
https://junkwood.info/?feed=rss2
