Removable Window Shelf for our Cat
Our cat likes to look outside a lot and see what is going on. She’s mainly an indoor cat, but sometimes she hangs out on our deck. When it is too hot or too rainy, the deck is not an option and she will sit on the back of the couch in order to look out the window. This causes the cushions to smoosh down and some of the dreaded cat hair always seems to end up there. So in an effort to try to encourage our cat to find other places to hang out and provide some creative time with the kids, we decided to build a “cat shelf” so that she can look out the window. The only caveat with this was is that we needed to make the shelf “removable” and able to mount on some of our other windows with the same sill and trim throughout the house.
Here’s the video if you’re interested in watching the build process:
Cleaning up a Stanley Jack Plane
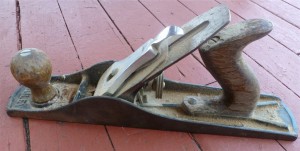
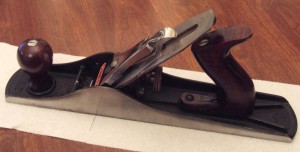
There is something satisfying about getting something broken back into working condition. I have a few small planes, but have wanted to get one with a longer sole. I read on a site where the jack plane was probably the first plane that you should have then followed by a smaller plane and how the jack plane’s name was derived from “jack of all trades” meaning it would be a good multi-purpose plane. A new cheaper #5 (jack plane) runs around $70 plus shipping costs. I decided to gamble on getting an old one of of ebay and fixing it up.
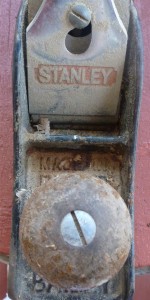
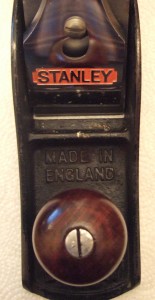
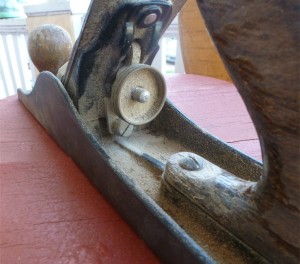
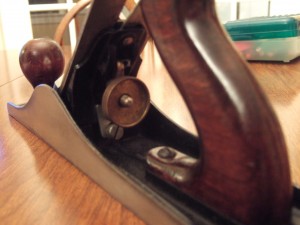
I got this one for around $29 including shipping.I figured if it was trashed beyond repair, I could always get another one and combine the parts. I spent a while in the garage cleaning, polishing it up, refinishing the wood handles and put an initial sharpening on the blade. I’ll need to try to get it a wee bit sharper before I seriously begin to use it.Here’s some before and after pictures.
(This is probably the worst part of all as I couldn’t get all the surface rust pitting off the bottom). I read where you could take it to a machine shop and have the bottom machined up, but I don’t think that is necessary as it is still “true” and sits nice and flat on a surface. I put on a little wax and buffed it off and I bet it will glide even more smoothly than some of my other smaller planes.
Now for the top views:
Here’s the adjustment knob and the back handles. I think if I used some brass metal polish (brasso?) the inside of the brass knob would shine better, but I don’t have any so that will have to wait. I used some oil first on the handles and let that soak in for a day. Then I just used some Deft brand lacquer finish on the wood. Two coats felt sufficient to me. One thing that I like besides the smell of the lacquer is that it dries so quickly. You can get on with your work!
and then
And finally from the side:
Chicken Tractor
This post should probably be entitled “Chicken Tractor – Lack of Planning” instead, however it is sometimes fun to just start on a project and see where it leads. The results are generally a little off from what you originally intended, but that’s ok.
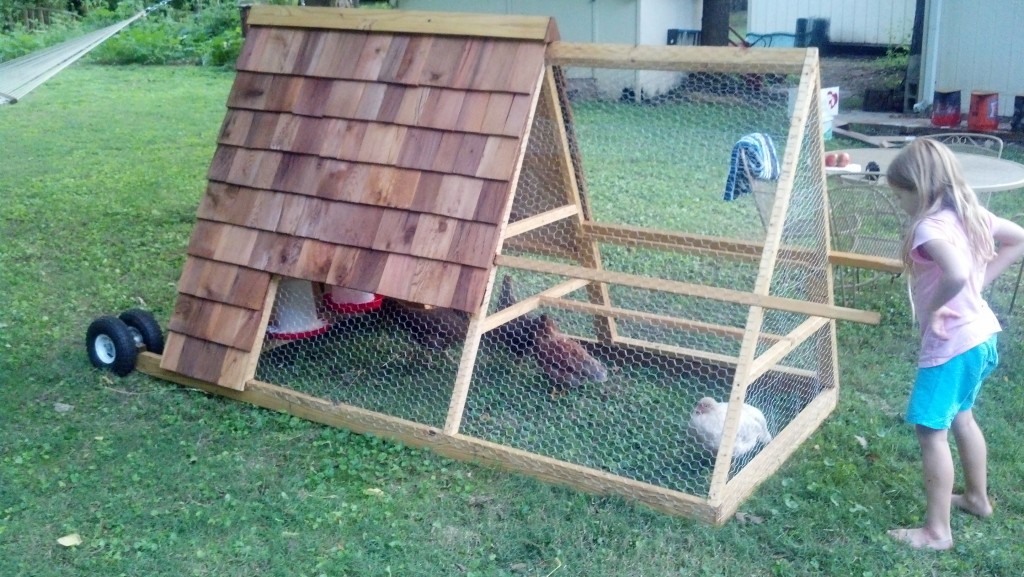
My sister and I worked the past few weekends on building my brother a mobile chicken coop (aka “chicken tractor”) for his birthday. The idea to do this for him was all my sister’s, but she enlisted my help and we built the unit together in my garage. Originally we had the plan roughed out on paper, but I tried to put some exact dimensions to it by creating the diagram in Sketchup. This was helpful for flushing out the material list, especially because it is easy to use the tape measure tool in Sketchup. For instance, just by clicking two times you can tell the distance of the lengths of a hypotenuse instead of getting out a calculator or using graph paper. In the end, I probably should have done more than just layout the skeleton of the coop as some of the details came into play at the end.
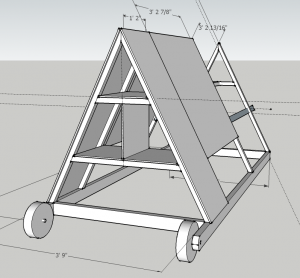
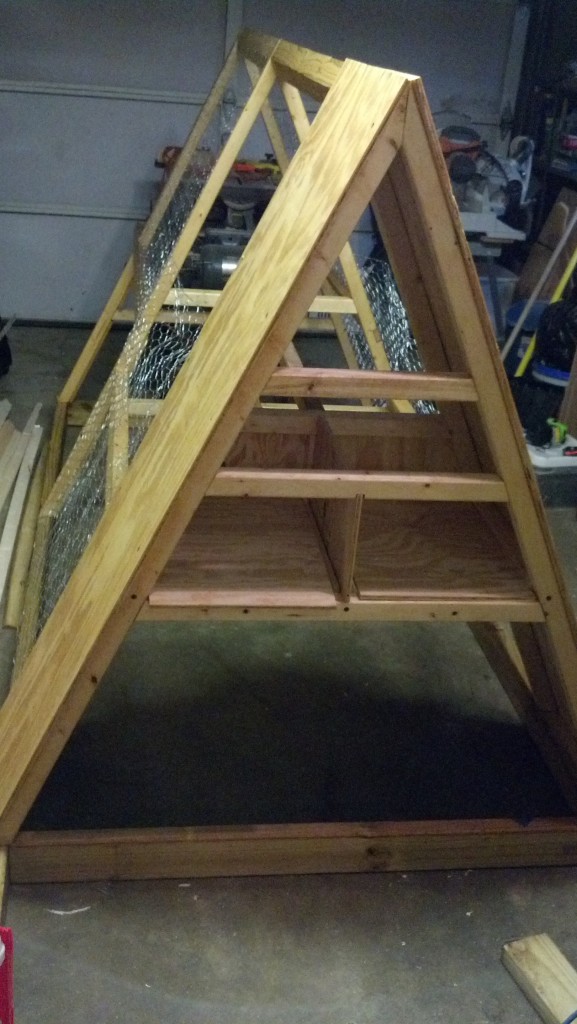
Here’s the basic skeleton for the chicken tractor. I should have detailed the plywood doors, hinges, cedar shingles and removable panel access as there were some issues created that we had to creatively overcome that could have been detected and accommodated in the plan.
In actuality, I don’t think we ran into any major snags. One thing that we wouldn’t have easily figured out from Sketchup is the end weight of the finished unit. We were conscious of this when the unit was being constructed, but it definitely was more apparent when we had it completed and located in grass instead of on smooth concrete.
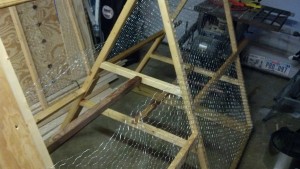
Here’s some of the chicken tractor framework. We did some lap joints in various spots to allow the chicken wire to lay flat and also help stiffen up the frame. The frame is quite solid and doesn’t seem to twist at all when picked up by the handles, probably due to all the triangles with cross-members.
Here’s an end shot of the nesting box areas. The floor portions are removable for easier cleaning. Apparently there are dimensions that are more comfortable for chickens to help them feel cozy and safe. I’m not sure the angled roof makes it worse or better, but I’d say probably more cozy as chickens are somewhat triangular themselves.
Also chickens need to take a dirt bath now and then. Another fact I was not aware of before this project. You want to have a tray located away from their feed and water. This necessitated an access panel on the side in order to add or remove the tray.
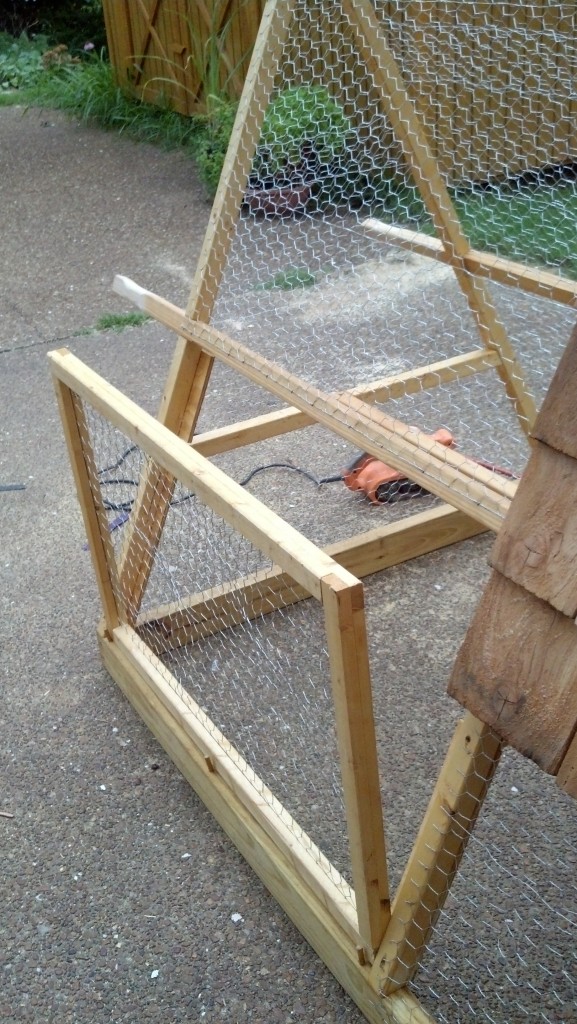
The panel is a simple frame which holds some chicken wire screen. If I had included the shingles in the sketchup plan I would have realized that the overlap of the shingles would have prevent the easy removal of the screen panel. Of course a few strokes with the block plane corrected the issue. Luckily it is not very obvious without laying a straightedge down the side of the shingles.
The two items that really added to the weight are the chicken wire and the cedar shingles themselves. It was hard to tell how much cedar shingles to get in the first place. This all depend on the overlap and the amount of bad cedar shingles in the bundle. Lowes was ‘low’ on what they had on hand and we end up basically finishing off what they had which was pretty rough… and the Home Depot next door didn’t even stock them!
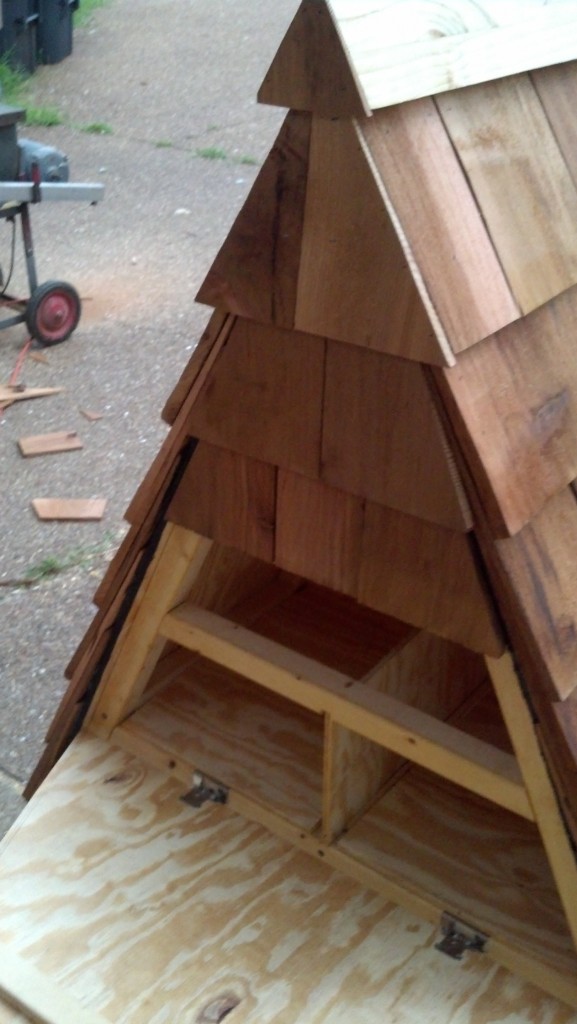
I think the cedar shakes make the chicken tractor less ‘ghetto’ especially as it may matter what the neighbors think when you’re doing this backyard hobby in the city!
Rare earth magnets sound like a really neat idea for holding one of the hatches closed, however I found out that the strength required to pull them apart with your fingers doesn’t always translate directly to holding a door shut. Some form of secondary latch may be required (I’ll need to check with my brother on this to find out of any chickens we able to run into the door hard enough to jar it open.
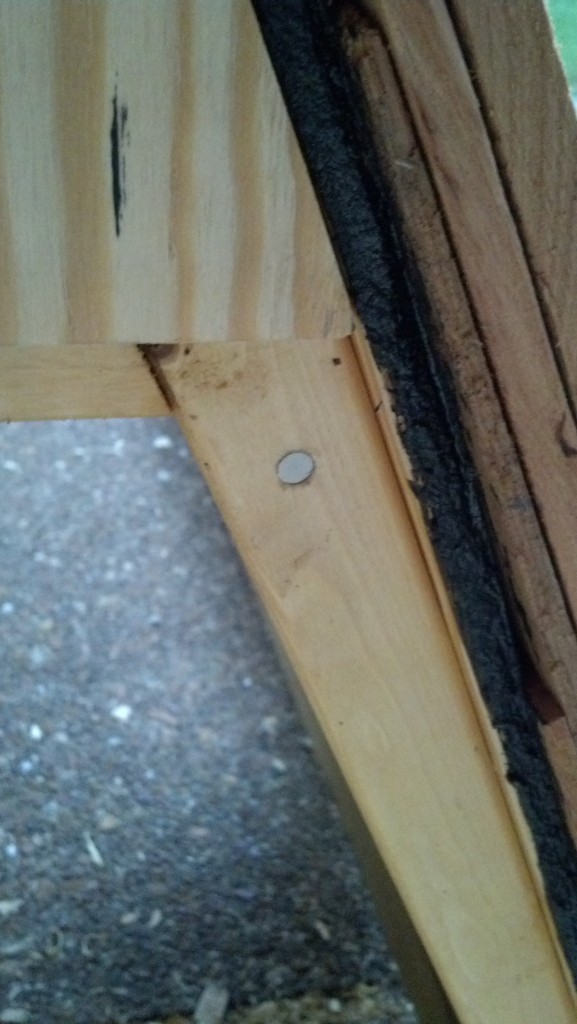
Part of the issue may be that by embedding the magnet in the wood of the frame and the door panel, it doesn’t necessarily make perfect contact together and the attraction is lessened.
The hardest part of the build was cutting the angular ridge boards out of treated stock. Sometimes it would be nice to have a table saw that could crank slightly past 45 degrees! We ended up adding an extra pair of wheels on each side as this balanced out the carriage bolt and kept it from trying to twist the bottom runner board.
Home-built Lawn Aerator – Part 2
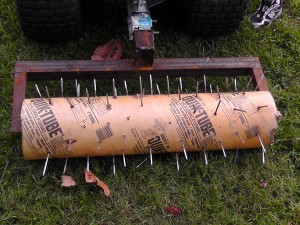
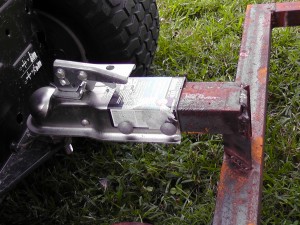
Well, after mowing today I decided to hook up the aerator for a few spins around the yard. It rained yesterday so the ground is nice and soft which probably helps. Here it is hooked up to my tractor. You can see my son’s shoe in the upper right corner of the picture… now how did that get in there?!
Yeah, you’re right. It’s already starting to rust already. I had contemplated painting it, but for some reason I like the idea of old farm implements “weathering and rusting” out in the field and kinda decided to leave it bare and see what will happen to it. It might be a tetanus accident waiting to happen, but I’m thinking the nails will rust too and paint won’t stick to them after a few laps around the yard, so what’s the point anyway.
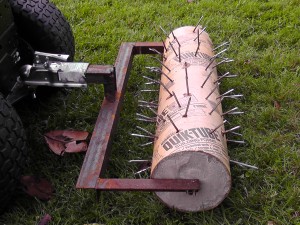
Here’s a view from the side. One thing I’ve found out is that some of the nails don’t take rolling over concrete too well.
I suppose if I ever made a second unit, I would shorten the nails slightly and put more of them in it to help it roll over the concrete better.
Ok. I did not have the hitch laying around the garage. I actually bought that at Home Depot, and for the last picture, I better show the rest of the parts that I had to specifically buy to put this thing together.
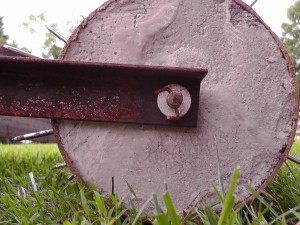
Here’s the side view where you can see the other purchase I had to make (axle rod and washers). I used some axle grease that my brother had on hand and the thing spins quite freely!
Here’s a video clip of it in action that my son recorded!
Home-built Lawn Aerator and Roller Combo – Part 1
*** Warning***
***This post has absolutely nothing to do with wood but hopefully it is interesting enough to read anyway ***
I’ve decided to try something wacky and build my own lawn aerator. In addition to poking some holes in the grass, I am hoping that it can smash down the mole tunnels at the same time due to the weight of it after it is filled with concrete. Best yet, I nearly have all the stuff laying around that I need to build it except a piece or two that I can pick up at the local Home Depot… or salvage from my brother’s scrap steel.
I’m sure the design isn’t the most “safe” configuration, but we’ll let the moles worry about that.
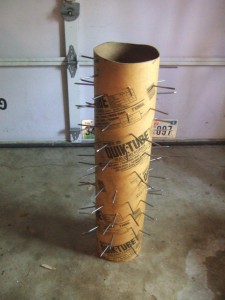
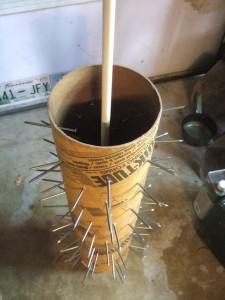
I used a drill equipped with a fairly small bit and randomly drilled holes all around the concrete form. I am not too concerned about the cardboard deteriorating. I figure I have the nails embedded deep enough that they won’t slip out on their own. Here’s a view from the top to give you an idea of what I mean.
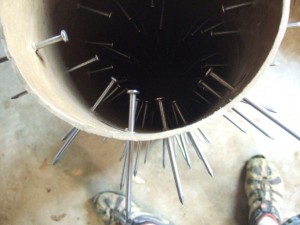
The nails are far enough into the cavity to hopefully stay put. They’re a size larger than a regular 16d framing nail so they are pretty hefty.
In order to prep the cylinder for pouring I cut a piece of rigid foam into a circle and marked the center. I stuck a piece of 1/2″ CPVC in the center of it, pulled it out and then stuck it into the concrete form.
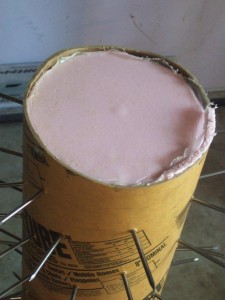
Here’s what will be the bottom side when pouring in the concrete. It serves a few purposes. To hold the CPVC tube in the center when pouring all the concrete in as well as keep all the concrete from running out the bottom.
Here it is flipped over and ready for the concrete to be added. I also made another circular foam cutout to hold the top side of the CPVC in the center.
I moved it outside and grabbed the concrete bags out of the garage. All the stuff I’ve used so far has been leftovers from other projects. I prefer to ignore the fact that I may have “over-purchased” on previous jobs and choose to believe all the stuff is “free” at this point. 😉
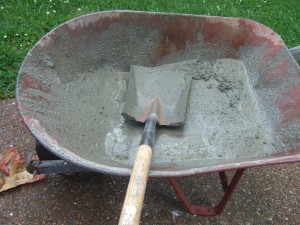
Ok ok.. I was sweating too much and my hands were a little too dirty to pick up the camera while mixing up the concrete and filling the form. I do think a flat bottom shovel really helps get it mixed thoroughly and a lot easier.
Here it is with it chalk full of concrete and the top foam piece in place.
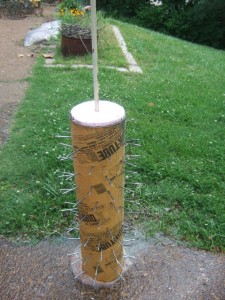
A wee bit of the concrete bled out of the bottom. I stuck a plastic bag under it just in case, but that really didn’t help at all.
I ended up buying a small ball hitch and a piece of round rod for the axle and welded it all together in my brother’s garage. Unfortunately I didn’t take any pictures over there during the assembly, but next post I make, I’ll try to take some of the finished product and have it hooked up to my riding lawnmower.


