Beehive!
My brother is planning on doing some bee-keeping this year. He emailed me the plans for a hive someone had posted online and we thought we could make it out of some of the oak I had laying around.
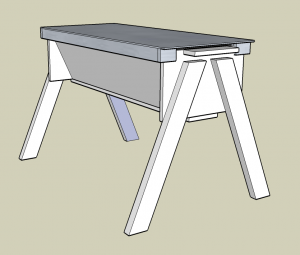
Here’s what the beehive is supposed to look like. I kinda hope that we deviate from the original design a bit – I think we may be able to make it more visually aesthetic.. at least just with the legs if nothing else!
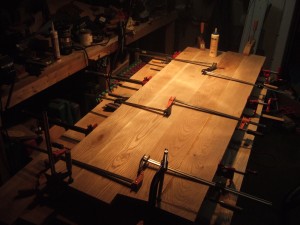
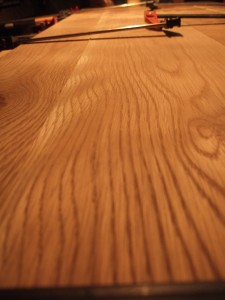
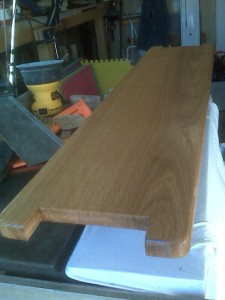
The plans mostly call for boards 12″ in width so we ended up doing some surface planing and glue-ups to get to the right width. Here’s the second round of glue-ups. I gotta admit, some of the grain is pretty nice looking… so I am hoping my brother opts not to paint them white. (hint hint…)
Oh yeah. It sure is pretty!
Planning – the Key to Success
I know you’ll probably consider this a little backwards, but I thought I’d show the planning for the hole in the wall for some of my most recent posts after the project is done. Planning for projects is a must… even if at the expense of spontaneity. Even something as simple as cutting out the hole in the wall can benefit from having a good, detailed plan. I had put in a bit of effort in re-creating the environment in Sketchup, mainly for two reasons. The first was to get an idea of the proportions of the opening to make sure it “felt” right. The second reason was to identify where the studs were in the wall and to consider how we could frame it in. I think the actual result ended up pretty much as planned! Here’s some pictures exported from the Sketchup program.
Hole Size and measurements of the wall, studs and cabinets – viewpoint from the kitchen:
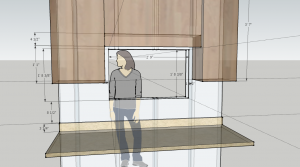
I ended up sending the picture to my mother prior to my brother and I beginning the work. I thought it was interesting that she felt the woman included in the rendering confused her and made it difficult to see how it would end up. Maybe it was because I had the wall somewhat transparent…
Here’s the hole from the living room side – a lot more boring looking…
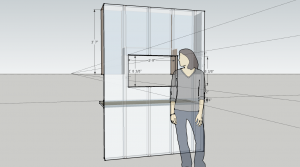
I suppose I could have tried to layout the walls for both the kitchen and living room, but I really just wanted to focus on the area where the work was going to happen and the size of the cabinets.
I always like to print out hard copies of the sketches to have on hand to reference and make notes on when I’m working.
Even though it is a “tool” to help with all these projects, I still just can’t bring myself to use my laptop in the garage where things like paint, sawdust, dirt and oils seem to get on everything.
Shelf Complete
My mother sent a picture of the shelf after she painted the surrounding wall. Looks quite nice!
Hole in the Wall – Now with Shelf!
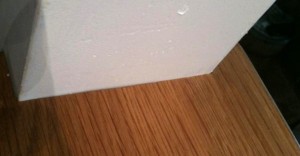
My brother installed the shelf in the hole in the wall over the weekend. I provided him with a chisel when he picked up the shelf in case he needed to fine tune some of the dimensions. Apparently after about 40 minutes it fit like a glove and I appreciate the effort he went to to make it just right. Here’s a picture he took of the portion where he did the chiseling.
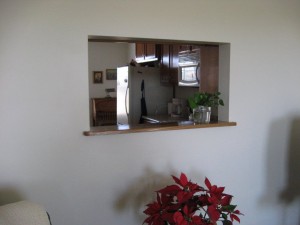
I was thinking that just applying the poly without a stain would be lighter than the cabinet woodwork, but Mom reports that it is pretty close. The pictures seem to indicate that as well.
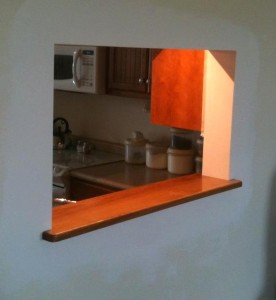
Maybe the cabinets have a little more red in them than the shelf, but I suppose it will be close enough.. especially if a plant or a knick-knack or two gets put there.
All that is left is to paint the wall. That’s one thing I definitely am not good at so I am glad the folks will be doing that themselves. 😉
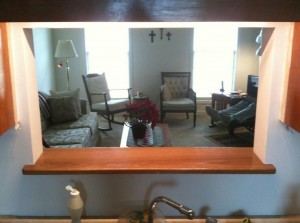
Shelf from the kitchen side. I like it shiny like that. I think the semi-gloss was a good choice around the sink where it might see a bit more water than elsewhere.
Also, my mother did a good job with the drywall finishing – it looks pretty good from what I can tell from the pictures. It is kinda nice that everyone pitched in together. Quite a nice team effort!
Hole In the Wall
My mom apparently doesn’t like washing dishes while staring at the wall. She requested that a hole be put in the wall that divides the kitchen from the living room which is a good idea. Mark and I spent most of a Saturday tearing into it and getting it roughed in with a first coat of mud.

Here’s the starting hole above the sink. We ran into 2 electrical runs in the wall, which prompted an emergency call to Wendy for assistance. We’d left all our electrical tools and supplies at home… whoops!
After Wendy brought all the electrical stuff and we re-routed the runs to the left of the holes in the attic, we really got underway. I didn’t take pictures of the progress, but Wendy remembered a technique from a “This Old House” episode where cuts were made lower into the drywall to accommodate the incoming studs for the frame. It worked out pretty well!

We used vinyl corner bead that you can see around the edges to protect them if they get bumped. I really like the stuff. The only trick is getting it to lay as flat as possible by making nice and neat corner cuts and not nailing it in too tight. I’ve decided that drywall screws just don’t work that well with the vinyl bead. Here’s Mark starting to apply the mud over it.
After he finished the coat of mud, we decided to call it quits for the day. Here’s pictures from both sides.
From the kitchen:
To get a little bit more space for something like a plant or whatnot, we thought about putting a wood shelf in the bottom part. Mom sent a construction paper template to me and I started working on it. I found a 9″ wide piece of rough oak in my pile of wood. I planed it down to a little over 3/4″ in cut it to an 8″ width and to length that she had specified. After confirming some of the dimensions with her on the phone, I finished up the notches on each end, put on a 1/4″ radius. After sanding it with my old random orbit sander which I just got a replacement pad for, I put on the first coat of poly.
I just hope it fits nicely…
